--ONGOING PROJECTS--
X Marks the Spot {thinking now, I may keep the name}
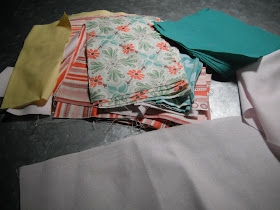
The front has been pieced for a few weeks now and it was time to work on creating a back. I didn't have anything planned out, so I just grabbed the stack of scraps I had accumulated and thought I would see what developed.
Here is where I am with it now. Some large pieces are laid out and starting to fill in the backing. I haven't quite had that ahh-ha! moment where I know it the way I want it, but I feel close.
Happy Garden (king sized)
I made the binding and laid it along the edge of the quilt to see again what it will look like. It's the perfect choice!
I also wanted to share with you one of the ways I roll my binding to keep it from getting wrinkled.
Start with an empty thread spool. Make your binding. Then get a small piece of tape. Secure one end of the binding onto the spool with the tape. And then begin to wind the binding around the spool.
Yup, simple as that! The extra bonus part is that as you are working to attach the binding to the quilt it unrolls very nicely... doesn't get tangled... and just over all makes me feel more like I know what I'm doing!
I have also attached the binding to the front of the quilt... all the way around. Have I mentioned lately that is quilt is gigantic? Last thing is to attach the binding now to the back.
I am debating on this one... I could either hand or machine stitch it. By hand with have a nicer finish, but will take forever; which may be ok as the weather cools off and I would want to snuggle under it as I work. But, on the other hand I want to get this one finished so I can wash it already and see what the quilting wrinkles up like.
My dilemma... to hand or machine sew the binding to the back? What do you think?
--STALLED--
Crewel Spring Flowers
Katie Fiber Art
{Insert Name Here}: Bottled Rainbows {ticker tape quilt-along}
I am looking froward to getting back to this one, but decided I needed a finish, so this one was put aside.
Crewel Spring Flowers
Nada -- poor pretty flowers.
Katie Fiber Art
No action here.
You Can Sew-a-thon!!
You haven't heard of it??... check it out here or read about our first project (Strawberry Pincushion).
You haven't heard of it??... check it out here or read about our first project (Strawberry Pincushion).
This Week's Work in Progress (WiP) Stats
Last WiP Wednesday Total: 6
New Projects: 0 (I have been so good to try and focus on what I already have going)
New Projects: 0 (I have been so good to try and focus on what I already have going)
Finished Projects: 0
Total WiP's: 6 (same as last time)
Total WiP's: 6 (same as last time)
日本のための多くの愛
Much love for Japan
Much love for Japan


Woof! Woof! Happy "WOW" Wednesday! My mom so wants to learn how to make a quilt. She said a quilt pillow pillow case/ or just a small placemats would be a good start. She's been reading a lots how to do the bindings ... a bit too complicated. Glad you plan to continue the sew a thon ... we posted a luggage tag tutorial. Oh! will check out Wantobe Quilter. Lots of Golden Woofs, Sugar
ReplyDeleteLove using scraps for a back - The X is so much fun!
ReplyDeleteneat trick with the binding spool. You're happy garden quilt is beautiful and I agree that the binding color is spot on perfect!
ReplyDeleteHand. Hands down. You will be more proud of it. Give your thread one run over a beeswax chunk and it won.t tangle. I can take about 4 - 5 stitches before i pul the whole thread length throuugh. Way faster!
ReplyDeletelove the king !! Beautiful!
Monika
PS that is a brilliant idea with the spool! Omg
ReplyDeleteoh oh--I'm re-doing the binding on a quilt as it looked horrible. I've seen others in blogs show how to do it.
ReplyDeleteI was planning on sewing the back around first them coming and doing the front....is my plan backwards?