Did you ever just have the need to create something. Like you can't get the thought out of your head and your fingers are just itching to make. to do. to be alive?
The power was out yesterday for a few hours and in the quiet my fingers led me to needle and ribbon. Which quieted my mind in a way that hasn't happened in sometime and I reflected.
I feel like serving as a soldier could be a similar type of calling. Just something inside that screams out that they need to protect, to serve, to stand for freedom.
I admit, I'm a military brat. Dad, Mom, Step-Dad, and both Grandfathers served in the military. Army and Navy represented here. I still cry and get weak when I hear the national anthem. I still beam with pride when I see a soldier in uniform or the American flag rippling in the wind.
And today, this weekend, everyday really... as we are enjoying our sunshine, bbq's, time with family, our simple happiness... let's reflect on the men and women who have secured that freedom for us and the friends and family that support them, and thank them for all they have done!
Showing posts with label needle. Show all posts
5.27.2012
1.31.2012
My Experience with English Paper Piecing
I'm ready to dish on my my English Paper Piecing experience to date and will either push you over the edge into trying it or send you running for the hills.
3. Basting your fabric to the templates
My original thought was that this step was felt like sewing the fabric twice, but after some practice this goes so fast! And I understand now that this is really just to help the pieces keep their shape before you start to join them.
So fun to see a rowdy stack of fabric bits transform into a groomed stack of shapes waiting for assembly! This is when I can really begin to visualize how great it's going to be.
4. Sewing your pieces together
5. Admiring the precision of your joints and your completed work! And repeat.
Reasons Paper Piecing is So Cool!
Now, go to the Rose Star Block Party Flickr group and get yourself started!!
I'm going to share this with Quilt Story at Fabric Tuesday, From the Blue Chair for Slash the Stash, and other weekly parties on my sidebar too!
Please note, this isn't a tutorial. There are lots of good tuts already written. My favorites are by Selfsewn and Sunshine's Creations; they're great to get you going! Or feel free to leave your own favorite tutorial in the comments. What I'd really like to do is de-mystify this technique and let you in that it's not as terrifying as it sounds.
Paper piecing breaks down into about five steps:
1. Cutting out your paper template
I originally thought, oh ya right, like I'm going to take the time to cut out paper and then fabric. I mean that's twice the work, right? But seriously... cutting out the paper is so darn fast and really reminded me how much I enjoy other crafty stuff.
My Tips: remember to use paper scissors on the paper... not your good fabric scissors and I used a zipper top plastic baggy to catch my cutout pieces as I'm cutting to keep them safe.
2. Auditioning and cutting out fabrics for each template piece.
You cut your fabric with an extra 1/4 seam beyond the paper template. Did I mention you can use scraps? It so cool to think that you can make something so pretty from so little fabric with this particular pattern. Really makes me feel like I am giving those little scraps an amazing home!!
*Confession... I iron as little as possible with any of my quilting projects, so for my first starlet I skipped ironing the fabric scraps and went straight to cutting, but... don't do that.
My Tips: it's so much easier to cut and baste the pieces if the fabric is ironed first! Lesson learned... the hard way!
3. Basting your fabric to the templates
My original thought was that this step was felt like sewing the fabric twice, but after some practice this goes so fast! And I understand now that this is really just to help the pieces keep their shape before you start to join them.
So fun to see a rowdy stack of fabric bits transform into a groomed stack of shapes waiting for assembly! This is when I can really begin to visualize how great it's going to be.
4. Sewing your pieces together
I know.. hand sewing? Feels so 1900's. But, I had an unexpected connection to the history behind all this and it's thrilling to know that this is how quilting was done back then.
Very deep! And it made me think about all the time that went into this craft.
5. Admiring the precision of your joints and your completed work! And repeat.
Reasons Paper Piecing is So Cool!
- It's a great way to use scraps!
- It's portable -- and here is a look at the kit I carry with me. That is a leather-like envelope type pouch, with little scissors, a needle and piece of batting to hold it, and I use bobbins to carry a bit of my basting and sewing thread. Easy to throw it in whatever bag I am carrying.
- It gets a lot more natural and quick with a little practice. By the time I was through my first starlet I had stopped poking myself with the needle and my speed is way more than triple
- The accuracy of the seams and joint is really stunning to behold
- Finger pressing the folds (using the heat of your fingers as an iron) while basting is one of my favorite parts
Now, go to the Rose Star Block Party Flickr group and get yourself started!!
I'm going to share this with Quilt Story at Fabric Tuesday, From the Blue Chair for Slash the Stash, and other weekly parties on my sidebar too!
3.22.2011
Fiber Art Junkie in the Making
Monika, this is for you! You've created a fiber art junkie!!
My sweet friend Monika, from My Sweet Prairie, put a magazine in my hands yesterday that really got my creative juices overflowing! Thank you again for doing that... I am so lucky to count you as my friend!
It was the perfect reason to drop everything else (ironing included) and start making my first real fiber art piece.
And just so you know up front... it did pass it's first quality inspection!
So, how did I get there... first step was to pick a picture to work from. I landed on this one of Katie to start with.
Next grab some fabric to be your background. I am using a white linen as the base and then some khaki cotton -- it's just two strips I had left over. I sewed around the edges of both of them.
I did omit using a fabric stabilizer... as I'm still trying figure out what that even is... *blushing* I did mention I have a lot to learn, right?
Next, I added a base body and head and sewed around those shapes. I have used my normal walking foot so far for all of this. This fabric is more burlap-esque. Really cool texture and it has that perfect golden shine!
Next, I added the ears. Here is one. All the pieces are free hand cut using regular fabric scissors. The ear is made from a more velvety fabric.
Here is an idea of what it looks like under the needle.
Before I started sewing, I cut a lot of the pieces I wanted out and laid them out together to see what they would look like.
I sewed the rest of the pieces down. Aren't those eye brows just to die for!!
A closer look at the textures and shapes!
Time to measure it up to the real thing. Katie did her normal two sniffs and then licked it. Her mark of approval!
Hmmm. Not a bad start. I have a lot of ideas for other details I would like to add like the whites of her eyes, the wisps of hair on her ears, chest, and shoulders. Whiskers, nostrils... all that good stuff that will make this more recognizable.
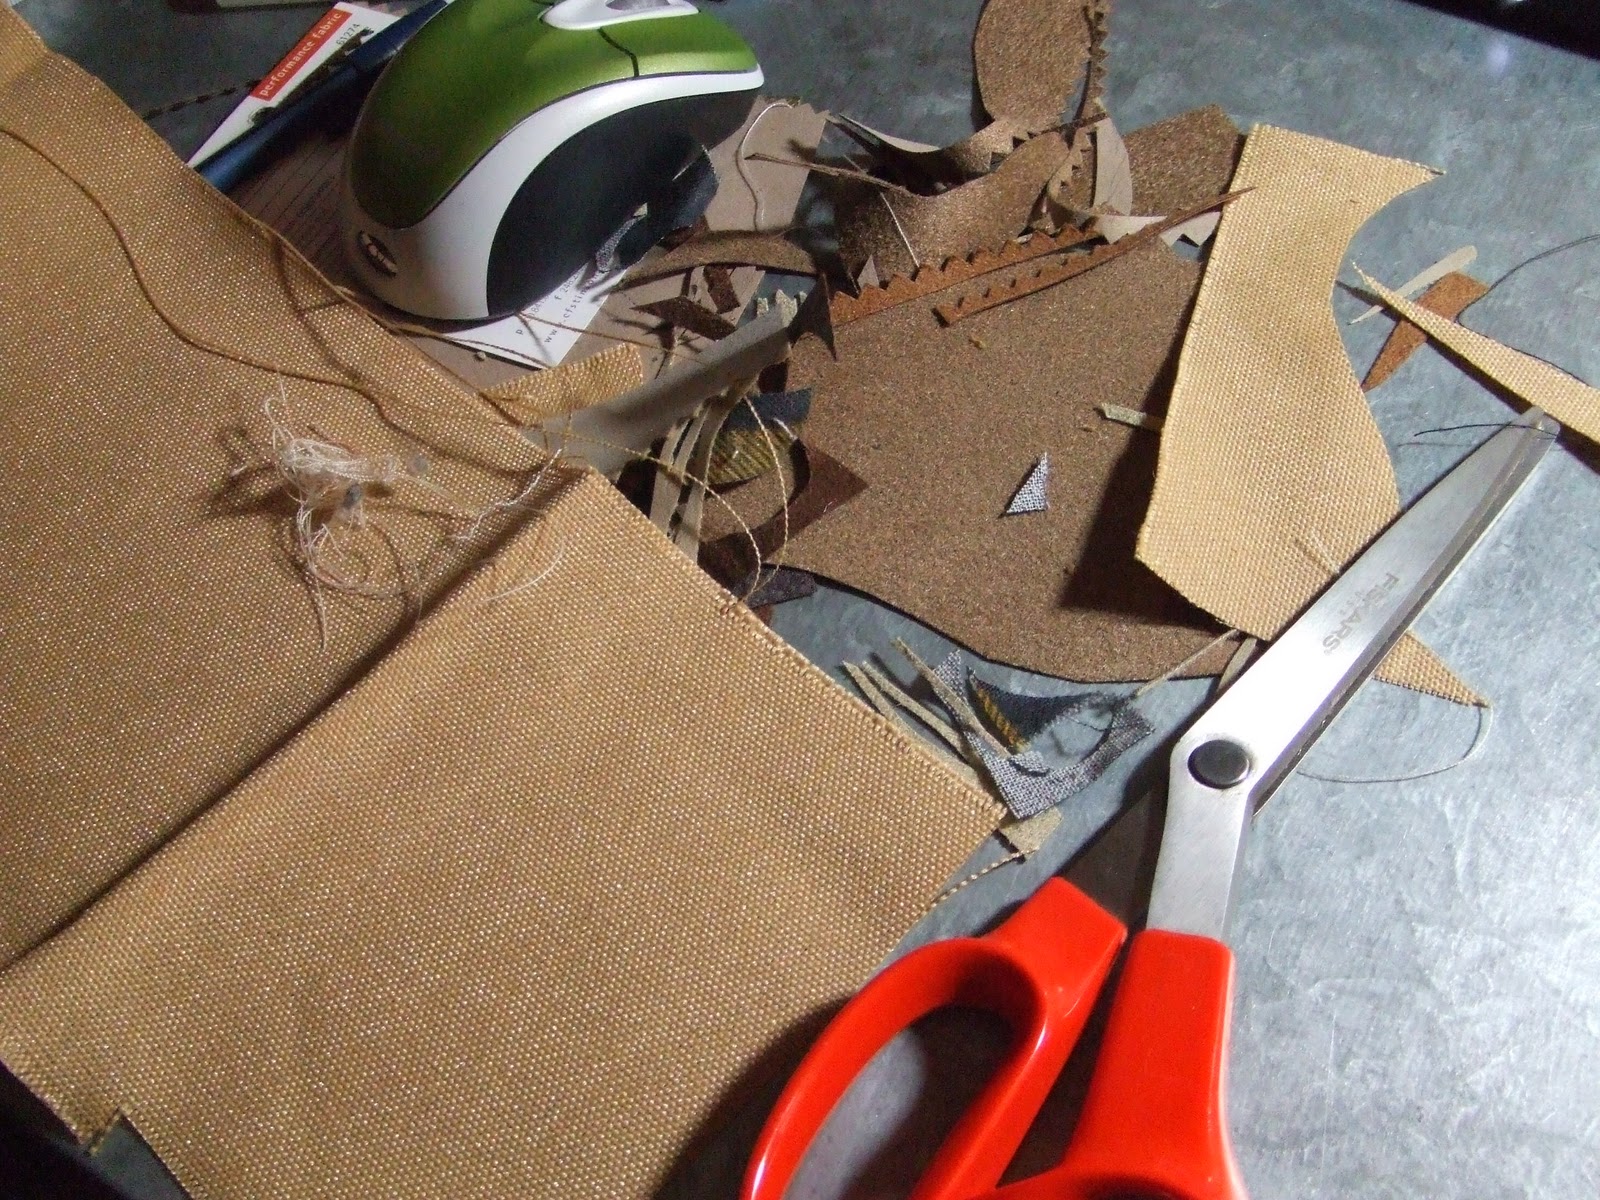
In the spirit of full disclosure.... this is a messy messy craft. For some reason I didn't anticipate the amount if little fabric pieces I would have on my desk after. Looks like I went a little scissor happy.
The last thing I did was to add two lighter shapes to Katie's body to reflect the lighter bands of fur she has. I'm really liking the different textures together!
Tonight, I think I will be putting on my free motion quilting foot and starting to shade in certain areas to add fur detailing. I'm really looking forward to the challenge and it's refreshing to work on a small piece before I dive into my next big quilt.
So, what do you think? Have you tried any sort of fiber art? Any tips you could pass on? Should I eventually put batting behind this and sandwich it like a normal quilt?
Hug the ones you love dolls.
I'll be back later today with a precious photo of flowers in the snow! Yes, we got some snow yesterday. But, this picture will make you want some, just you can photo flowers in the white stuff!
-- I am joining Fabric Tuesday at Quiltsory --
日本のための多くの愛
Much love for Japan
My sweet friend Monika, from My Sweet Prairie, put a magazine in my hands yesterday that really got my creative juices overflowing! Thank you again for doing that... I am so lucky to count you as my friend!
It was the perfect reason to drop everything else (ironing included) and start making my first real fiber art piece.
And just so you know up front... it did pass it's first quality inspection!
So, how did I get there... first step was to pick a picture to work from. I landed on this one of Katie to start with.
Next grab some fabric to be your background. I am using a white linen as the base and then some khaki cotton -- it's just two strips I had left over. I sewed around the edges of both of them.
I did omit using a fabric stabilizer... as I'm still trying figure out what that even is... *blushing* I did mention I have a lot to learn, right?
Next, I added a base body and head and sewed around those shapes. I have used my normal walking foot so far for all of this. This fabric is more burlap-esque. Really cool texture and it has that perfect golden shine!
Next, I added the ears. Here is one. All the pieces are free hand cut using regular fabric scissors. The ear is made from a more velvety fabric.
Here is an idea of what it looks like under the needle.
Before I started sewing, I cut a lot of the pieces I wanted out and laid them out together to see what they would look like.
I sewed the rest of the pieces down. Aren't those eye brows just to die for!!
A closer look at the textures and shapes!
Time to measure it up to the real thing. Katie did her normal two sniffs and then licked it. Her mark of approval!
Hmmm. Not a bad start. I have a lot of ideas for other details I would like to add like the whites of her eyes, the wisps of hair on her ears, chest, and shoulders. Whiskers, nostrils... all that good stuff that will make this more recognizable.
In the spirit of full disclosure.... this is a messy messy craft. For some reason I didn't anticipate the amount if little fabric pieces I would have on my desk after. Looks like I went a little scissor happy.
The last thing I did was to add two lighter shapes to Katie's body to reflect the lighter bands of fur she has. I'm really liking the different textures together!
Tonight, I think I will be putting on my free motion quilting foot and starting to shade in certain areas to add fur detailing. I'm really looking forward to the challenge and it's refreshing to work on a small piece before I dive into my next big quilt.
So, what do you think? Have you tried any sort of fiber art? Any tips you could pass on? Should I eventually put batting behind this and sandwich it like a normal quilt?
Hug the ones you love dolls.
I'll be back later today with a precious photo of flowers in the snow! Yes, we got some snow yesterday. But, this picture will make you want some, just you can photo flowers in the white stuff!
-- I am joining Fabric Tuesday at Quiltsory --
日本のための多くの愛
Much love for Japan
3.07.2011
Don't Be Crewel
I started to show you the latest craft I have been working on. It's called Crewel. Funny name, right?
What is Crewel Embroidery or Crewelwork? Well, let's take a look.... here is snip from Wikipedia
Crewel Embroidery, or Crewelwork, is a decorative form of surface embroidery using wool and a variety of different embroidery stitches to follow a design outline applied to the fabric. The technique is at least a thousand years old. It was used in the Bayeux Tapestry, in Jacobean embroidery and in the Quaker tapestry.
The origin of the word crewel is unknown but is thought to come from an ancient word describing the curl in the staple, the single hair of the wool. Crewel wool has a long staple; it is fine and can be strongly twisted. Modern crewel wool is a fine, 2-ply or 1-ply yarn available in many different colours.
This has been around for at least a thousand years? Hot dog!
It all started, when my Mother and Sister in law went to a fabric/craft sale. Sweetheart Sister saw this kit and knew it was meant for my hands. And voila, my Mother in law started showing me how to tackle Creweling and embroidery in general two weeks ago and I'm hooked!
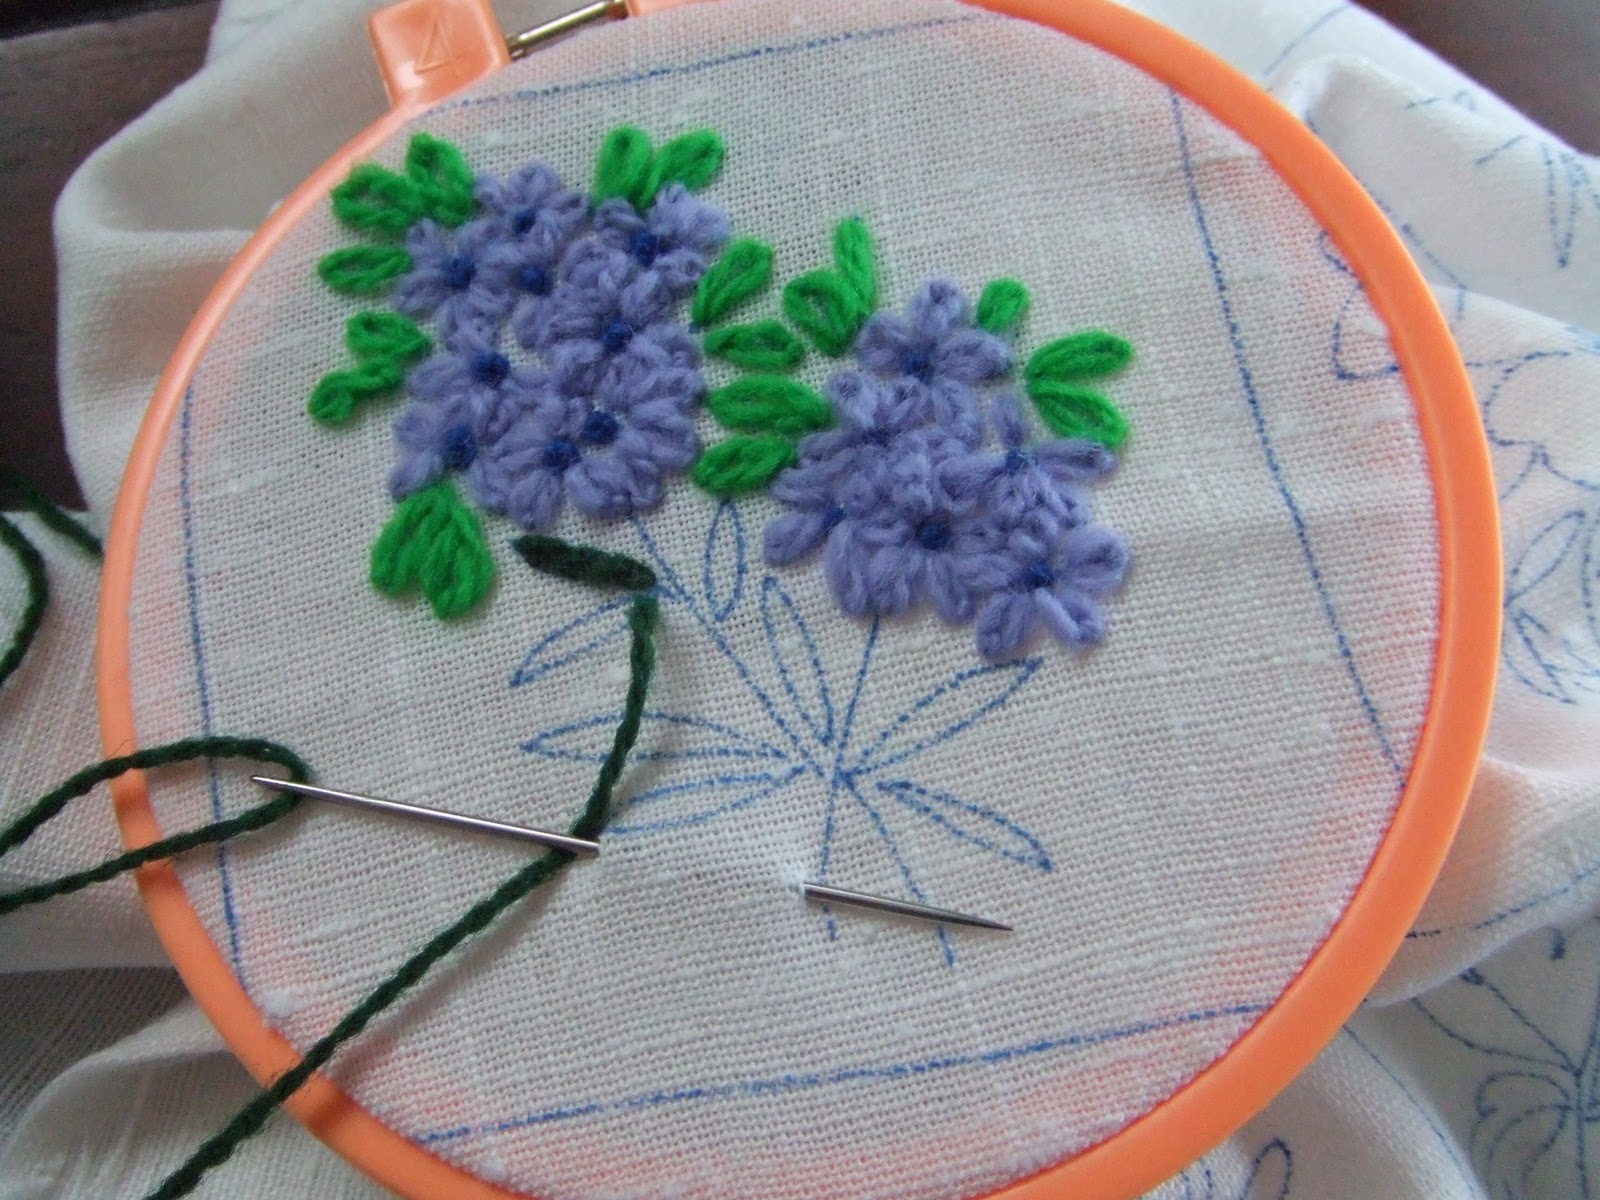
The kit came with the pattern, pre-marked background, needle, and all the yarn needed to make this nine flower design. It also has enough fabric to make this into a pillow when I am finished. Can you tell I'm excited?
And aren't those flowers just incredible!!
Here is the second flower I began working on. The yarn colors in this kit are what make it so darn amazing. Every thing is bright and bold (just the way I like it) and screams sunshine!! The colors are ending up brighter than even the instruction sheet captures them as. Whoop, whoop!!
Over the weekend I was able to finish the first two flowers. And I began working on the red flowers in the top center row. I am slowly getting the hang of each stitch and learning what the difference is between a satin and loop stitch.
Plus, I have really begun a love affair with French Knots. Up through the fabric, loop around the needle twice, hold tension on the free yarn, and back down through the same spot with the needle. So clever!
And speaking of flowers, look what's blooming!!
The paperwhite bulbs that we planted together and saw growing nicely before the weekend!
The little orange centers are delightful, they are so fragrant, and I can't believe how much fun it is to watch them begin to open up.
Nearly all six bulbs have opened now and I can feel them pulling me through the last few snowy/rainy/foggy/hide under a blanket/where is the world is the sun/tired of being locked inside days.
They also reminded me that I could probably begin to start my seedlings for hot peppers and tomatos!! I know garden time is coming!
Melt snow, melt!
Happy Monday Lovelies!!
2.27.2011
Weekend a'la Relaxing!
I. am. taking. a. collective exhale.
Letting all the gray and slop of the week slip away.
Here is a peak into what that looked like this weekend.
I can feel my shoulders relaxing. My eyes feel more rested. And I am smiling and laughing with the mister.
Honestly, this weekend has been the best medicine a tired stressed gal could ask for. Bring it on March; this tough cookie can't be held back.
Letting all the gray and slop of the week slip away.
Here is a peak into what that looked like this weekend.
I can feel my shoulders relaxing. My eyes feel more rested. And I am smiling and laughing with the mister.
Honestly, this weekend has been the best medicine a tired stressed gal could ask for. Bring it on March; this tough cookie can't be held back.
11.23.2010
Plaidly Update and Fabric Loving
I am making some serious progress on the Plaidly Pocket Quilt! The quilting is nearly done, I am moving to quilt the outer most row tonight. I'm not looking forward to binding, but will muster the nerve to get on it! If you know of a binding tutorial... could you be a doll and leave it for me in the comments or email me with it? Purdy please?
I have done a lot of pinning and re-pinning over the last few days. Pinning and I aren't BFF.
This quilt has also been interesting since I broke one needle and bent two others in a matter of a few hours. After the first one, I was thinking ohhhh this happens. After the second one, I was thinking I am so doing something wrong. The third made me look everything over and I think I nipped it.
I couldn't be happier with how the quilting is coming out overall. The quilting I decided on is adding to the plaid square look nicely and I enjoy holding this quilt so much -- its so darn soft!! It has been pure joy putting this together and I just can't wait to see it to it's new home shortly!
I have also taken out a bunch of other fabrics to be put on the chopping block (cutting block?). Once I start getting into these sewing grooves I get pretty obsessed with making things and just gotta keep rolling. Hurt me, right?
Can you see what these will become? It's funny... I can look at fabric stacks like these and already start to see in my head what they will be. I know... it's some sort of sickness isn't it. Either way.. I love it and wouldn't have it any other way!
I was also recently inspired by Miranda at Miranda and Charlie (who I met through Stash Manicure) to do something with my scraps (who were sadly stuffed in a box and mostly unseen for a year). Here is what Miranda did. She took her scraps and put them in a pretty glass jar. So simple, so genius!! Such a cool way to be able to see all the scraps together for inspiration!! Below are pictures of Miranda's scrappy jar.
Here is my attempt at putting together a scrappy jar.
I took a vase that wasn't being used and stuffed the 'ole scraps in the there (they're free of that boring dark box)!
It really is fun to reach in and grab a scrap and remember what else that fabric was included in. It's also helpful to see all the scraps mixed together like this. As, I spin the vase I can start to visualize different things I want to try!
And yes, that is pirate skull and cross bones ribbon. It's ok to have ribbon in my scrappy jar -- after all ribbon needs love too!
Subscribe to:
Posts (Atom)