8.23.2011

Groovy Gathered Clutch with Dots and Coffee!

I have had this Gathered Clutch from Noodlehead on my want to do list for some time now.  And guess what?  I did it.  I decided a few nights ago that I wanted to start something that I could finish the same night... and this is much more doable than a whole big quilt in one sitting.

I read through the materials list and then started to gather up my supplies. For fabrics I pulled Michael Miller Baby Feelin Groovy in Charcoal, Michael Miller Dumb Dot Gray, and Saturday in Brown.  I also grabbed my fusible interfacing (first time using it) and a gray zipper.


I started to cut all the pieces as the instructions were wrote and started to see that there maybe a better fabric match to line the clutch.  I grabbed this coffee pattern (sorry I don't have the name of it handy).  I was tickled because it has the same light blue tone!


As promised this clutch really did come together rather quickly.  Here is a look at my gathered front.

I'm so proud, I even figured out how to use the basting stitch on my sewing machine for the first time which is used to create the gathers!


Here are the credit card slots for the lining.  Yup, those chocolate kisses and coffee cups are perfect! 


And here is the clutch all put together!  Another first for me was using the zipper foot on my sewing machine.  I have only had it a few months now and apparently haven't strayed far from quilting.  It wasn't nearly as scary as I remember it being to use the zipper foot.


I enjoyed the technical challenges that this little project posed.  They were like good reminders to help me brush the dust off some of my sewing skills.


And here is a quick peak in the clutch. 


Yup, I'm pretty smitten with this one.  I am working my way up a little into trying to sew a few skirts or a dress.  I also can see making this clutch a few more times.  I already have a few other color schemes in mind and I have a few ideas for how I might tweak the design a bit. 


Just goes to show that sometimes you should just take the leap.  Go for it.  Give it a whirl.  You may be really proud that you did!!

I am sharing this at Fabric Tuesday at Quilt Story as well as a few other parties from my weekly party list!


Fresh Poppy Design


8.22.2011

Happy Hippo Coloring Pages {free}

I hope you are having a lovely Monday. 

I am camera-less today... so no origami bookmark tutorial -- that will have to wait another day.  Instead, how about some 'Happy Hippo' coloring pages?  Is there a point where someone is too old for a coloring page?  I hope not. 
 
So, print a few out.  One for you.  One for the kiddos or little's.  One for the neighborhood kids. 
Break out your markers, color pencils, or crayons and enjoy the freedom of creating!!
You can download a PDF file with all three pages here.  {for personal use only}

Shameless plea:  Please vote for my 'As Happy as a Hippo' fabric design at the Connecting Threads contest by August 31st.  I am four rows down on the left... hippo design; of course!  Your vote gets me to round two... and thank you for your continued support to reach my designing dream!!

8.20.2011

Friday Night Sew-In - Blue and Successful!

I had a lot of fun last night and made a lot of progress too. 

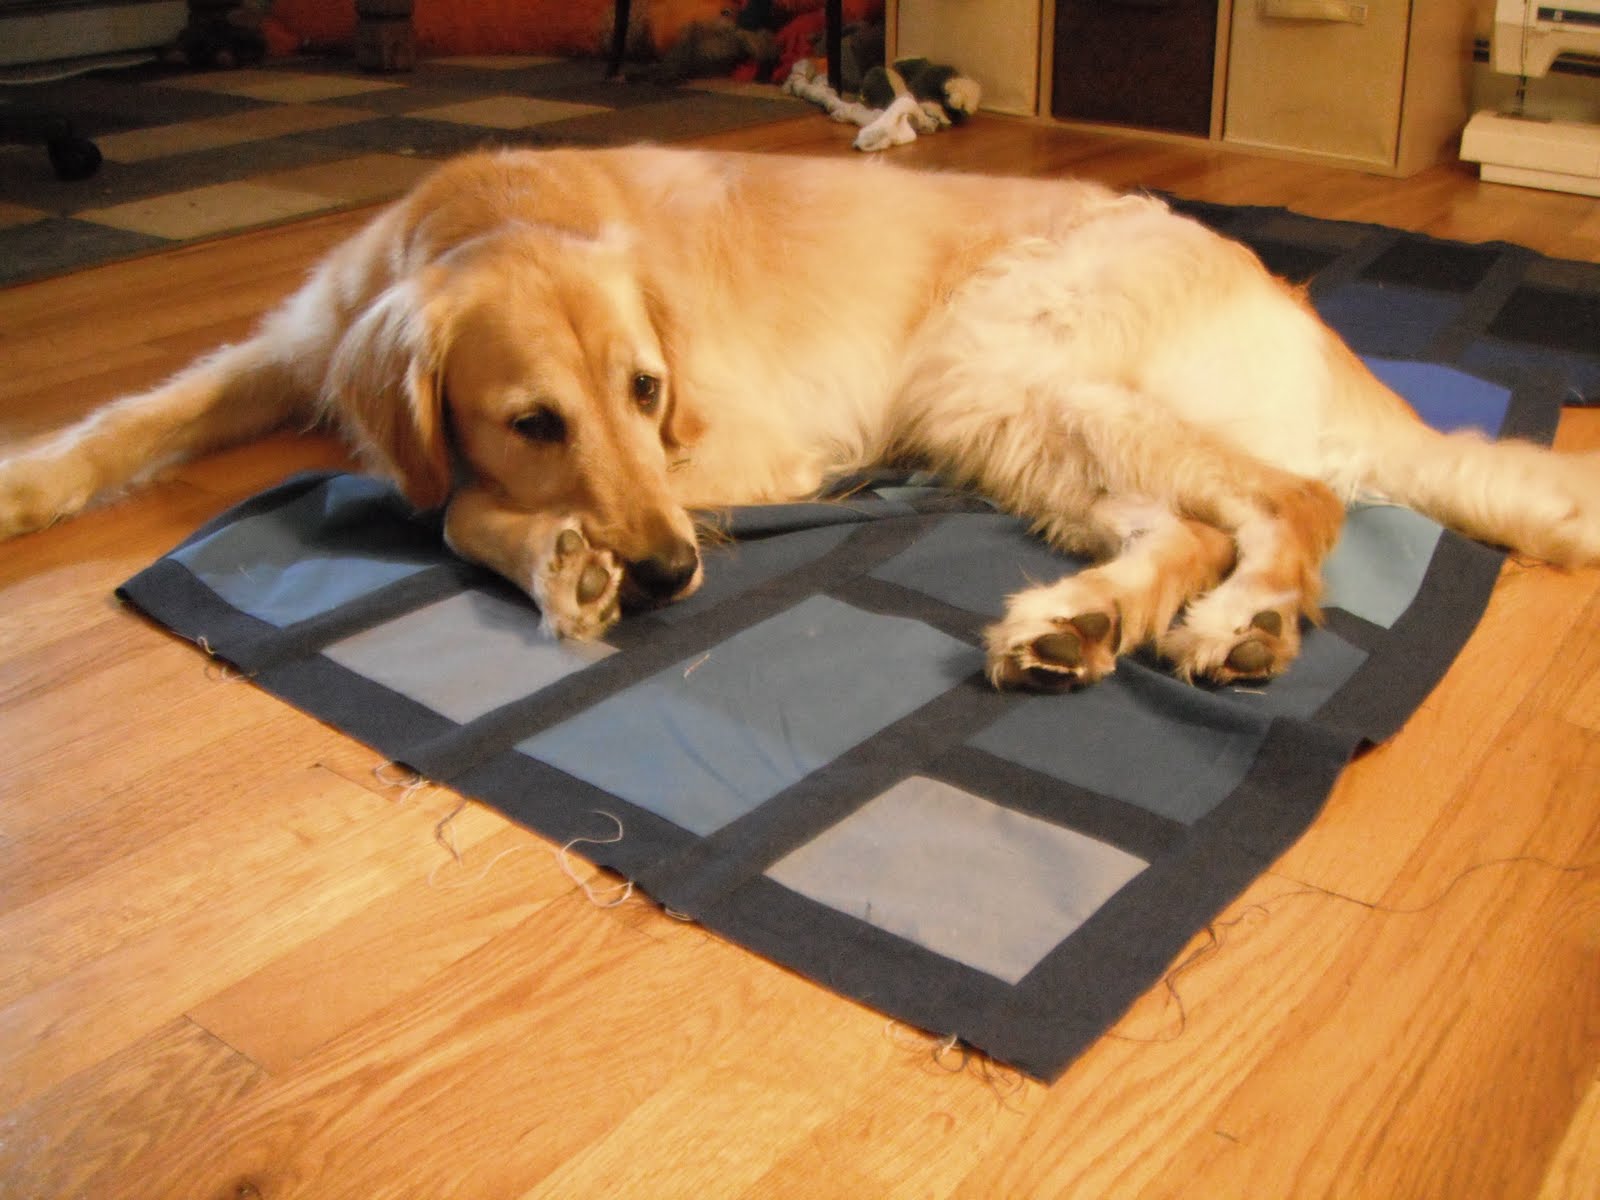
Ohhhh... and just look at this neat shot I was able to take this morning.  It's the top on the floor with the sun shining through the window and just lighting up a square of it.  Coolness!!


So, let's back up for a second and see what I did.  I wanted a pattern that was simple to really just show off the solids.  I will tell you more about it on Work In Progress Wednesday. 

Here is a pile of blocks recently turned to a row. I added a navy linen sash.  I'm enjoying working with linen.  It's very soft, has great color personality, and really adds a nice texture to the solids!  I also used the navy linen in between the blocks. 


Here is the first row together and sashed.  It's the bottom row of the quilt.  Looks great! 

Took everything to keep the pups out of the picture.  And yet, they still managed to slip a toy in. 


I sewed and ironed, and sashed, and repeated six times.   I spent special attention on the how everything was lining up and couldn't be happier with how it's coming together.  (sorry it's a bit blurry)


These six rows are to be half the quilt -- so far.  I need to think about the size again once the top is together and I am probably going to be adding an additional border or two to make it a bit bigger.

And this is the reason that I didn't get any better daylight pictures.  Yes, it was sunny and amazing today and we ran outside .... stat! 


Hope you are having a great weekend and that you do a lot of what you enjoy most!

8.19.2011

Friday Night Sew-In - In Full Swing Here

I have a certain stack of blue fabrics that are being sewn, sewn, sashed, and sewn tonight. Bliss!! 


That's what a Friday Night Sew-In is all about. You make it possible for tons of uninterrupted sewing time for yourself!


Handmade by Heidi


And yes, of course my quality control sweeties are on sight and fully performing quality control activities.  Isn't their tandem sleeping adorable?


I'd like to re-introduce my Senior Quality Controller, Katie -- the four year old golden retriever.  She's a super goldie and has always been very interested in my sewing laying on my fabric.


This is Sammy.  She is currently interning with us to be a Quality Controller Jr.  At only four months old she is off to a wiz-bang start and I see a lot of potential in her future!


I have really been enjoying the Pets on Quilts show being hosted by SewCalGirl and thought it would be fun to introduce you to my two furry babies who often keep me company while my machine hums along.  Make sure you go and check out all the other furry and not so furry dolls!


See you back tomorrow when we will look at how all this sewing time is paying off! Bliss!!

Happy Moment #37: Summer Fun Makes Me Sleepy!

A Friday ritual with Soulemama.  A single photo - no words - capturing a moment from the week.  A simple, special, extraordinary, happy moment.  A moment I want to pause, savor and remember. 

If you're inspired to do the same, leave a link to your 'moment' in the comments too!


“Be happy for this moment. This moment is your life.”
~Omar Khayyam

日本のための多くの愛
Much love for Japan

8.18.2011

Woodfired Pizza Dumplings/Rolls

Confession: we have homemade pizza about once a week. 

During vacation last week I thought it would be fun to reinvent pizza night. 

I started with the usual pre-made dough and mozzarella cheese.  This would also work with shredded cheese.


Mr. Happy started up the wood fire oven.  Yes, we have a wood fire oven.  It was built by the previous owners and I have to admit that it's pretty darn cool!  And under used... we need to find reasons to use it more! 

Here you can see the smoke pouring out. 


Gave the dogs each a 'soup' bone (the kind from the store that has the marrow still in) to keep them happy/busy.

I am also joining in on Tasty Tuesday with Sugar the Golden Retriver and Kolchak from Kol's Notes


On a cutting board, I flattened the dough with my hands in to a rough rectangle.


Cut the rectangle into eight squares.


Then I went back to check on how the fire was doing and shoved a few more pieces of wood in. 

Oh, and as a side note, these rock ovens + our location in the woods seem to be spider heaven.  Mr. Happy pointed out that there was massive (and thankfully dead) spider in there.  Ick!  Seriously it was the biggest one I have seen in NY.   


Back to dough.  Roll each dough square in to a ball and then flattened them like mini pizzas.


Add a tomato sauce of your choice in little blobs.


Open and cut up the mozzarella.  I also chopped some fresh basil from the garden.


Layer the cheese on the sauce.


Generous heap of basil on top of the cheese.


Now, you bring the sides of the mini rounds together.  I found it worked to do two opposing sides at a time. 


Then a little *pinch, pinch* and you form your dumplings!


And then I flipped them upside down. 

For next time: I think I will leave the 'pinched part' at the top.  When they baked... the cheese and sauce oozed out and it would have been extra yummy for it to ooze out the top and all over the dumpling!


I use a regular baking pan lined with parchment paper (so the dumplings don't stick to the bottom) to cook these in.  It's a pan that has been abused a few times like this and is still going strong. 

I also brushed the dumplings with tomato sauce.  You could probably use butter instead if you like.


When the woodfire oven was ready I took the dumplings to meet the heat.


Popped them in.  The fire and coals get pushed to the back and the pan bakes in the front.


They only took about 15 minutes to get nice and toasty with the cheese and sauce melting out the bottoms.


Dipped in a little more sauce mixed with parmesan and I think we have hit a recipe to try again!!


So easy.  So versatile.  So fun!  And yes, you could do these in a normal oven too!  And let me tell you... the leftovers the next day were incredible!

Hope you give these a try!!

8.15.2011

Lend Me Your Votes!!?!

I did it.  I entered my fabric design in the Connecting Threads fabric design contest.  Here is a peak at what was up my sleeve.  It's called "As Happy as a Hippo!"  Wouldn't this make an awesome addition to a quilt? 

Hope you are nodding your head yes.... in order for my designing dream to come true I need your help to vote it to the top five so I can get to round two! 

I am on the first page, three four rows down on the right left.  


Thank you so much for your help and can't wait to crank out a few coordinating fabrics for round two!  Then it will be free fabric for all of us!!  Big party style!!

XOXO

Hands in the Dirt: from Aquarium to Terrarium

At one point we kept a fish tank.  Well actually we have two fish tanks.  I don't talk about them much ... and that's probably a good thing since all the fish in our large tank have passed on to fishie heaven.  We thought about starting the tank up again, it was a tough call after having one fish live with us for almost three years, but we decided not to.

So, what to do with a 29 gallon tank and stand?

First of all... I drained the water.  It was full to the top, I luckily remembered to take this picture mid-draining.


Then, I flattened out the rocks and cleaned the glass. 


I added about one inch of sphagnum moss (was surprised to find it at Home Depot of all places fairly cheap!) on top of the rocks.  Then, a bunch of potting soil.  Then, I started planting little indoor plants.  I also put the fish rocks and decor back in between some of the plants for added drama.

And voila!!


Here you can see (from left to right):
"Creeping Fig" Ficus, "Silver Tree" Pilea, Polka Dot plant, and Spider plant in the back right


On the left side we have (from left to right):
"Magenta" Dracaena, African Violet, and I have a bit of Christmas Cactus behind the horse 


After everything was planted I gave it a generous watering until I could start to see some of the water making it's way down to the rocks. 


I really think this is going to be a great transition for me to indoor gardening over the winter. 

I know, it's only August... I shouldn't be talking about winter.  But I am.  This should make those cold winter months more manageable.  I hope.


I am going to see how these plants make out for a bit.  Hoping they are all hardy and low light enough to thrive.  I was also thinking about adding a few aromatic plants like mint or oregano. 


And there you have it!  I now get to tend to my very own little terrarium -- we are only on day three, I'll be sure to let you know how it fairs.

Also, here is a shopping list in case you also have an old aquarium laying around that you want to set up as a terrarium:
  • old aquarium - I used my old aquarium... doesn't mean a new one wouldn't work.  You can also look for other containers.  Really the sky is the limit on what can become a terrarium.small rocks/pebbles
  • small rocks/pebbles - these are also used for drainage.  If you had a fish aquarium, then by all means use the same fish rocks.
  • small indoor plants - I found "Angel Plants" to be good ones for low-medium light and the bonus is they purify air too!!  These ran me about $2-3 a plant.  I also looked around at my current house plants and clipped a few pieces of the spider plant and Christmas cactus to include.
  • potting soil/dirt
  • Sphagnum moss - this is optional; but seems to really help the plants from getting too dry.  I managed to cover the whole surface for about $4.
  • decor - anything goes for this too.  I used a plastic horse, fish rocks from the aquarium I had previously kept, and that rad skull which also came from the aquarium.
 Do you keep a terrarium?  I'd love to hear about it!!  And if you set up a new one, I'd love to hear about your experiences as well! 

Let's go garden!! 


I will be adding to these parties:
Making
homeworkPhotobucket<
Link up you latest project every Wednesday on the Elle Belle Creative Your Way Wednesday link party!Suzy's Artsy Craftsy SitcomRhinestone Beagle
504 MainChildmade
Related Posts with Thumbnails