Showing posts with label folded. Show all posts

5.17.2011

Origami Spring Flower {tutorial}


Re-posting this since it doesn't seem to be coming back after Blogger's recent hiccup.

I'm here today to help you get your spring flower on.  These origami flowers can be used to make a bouquet, decorate a package, as a pin on your lapel, on a headband, decorate a bike for a parade... well you get the point. 

They are so cool!  After I show you have to make one you are going to want to make a whole field of them!  Serious!

Here's how you get started.

Step one.  Start with a square piece of paper (I used pre-cut origami paper).  Printer paper has about the right thickness, but you could also use wrapping, news, or magazine paper.  With the pretty side of the paper down (the part that will become the center of the flower) fold the paper diagonally pulling one corner up to the opposite corner.


Open the previous fold you just did.  See, you can do this!!  Origami totally rocks!


Yup, you guessed it... now turn the paper 90 degrees and fold the other corner to the opposite corner.


And yes, open it back up.  You should now see an X made from the two folds you just did. 


 Step two.  Turn the paper over to the pretty side.


Fold the paper in half bringing one flat edge to the opposite flat edge.


Then open up your paper and fold again in the other direction.


Your paper will now have lines horizontally, vertically, and on both diagonals!  Ta-da! 

If you have followed this far, then you are going to be able to do this for sure!


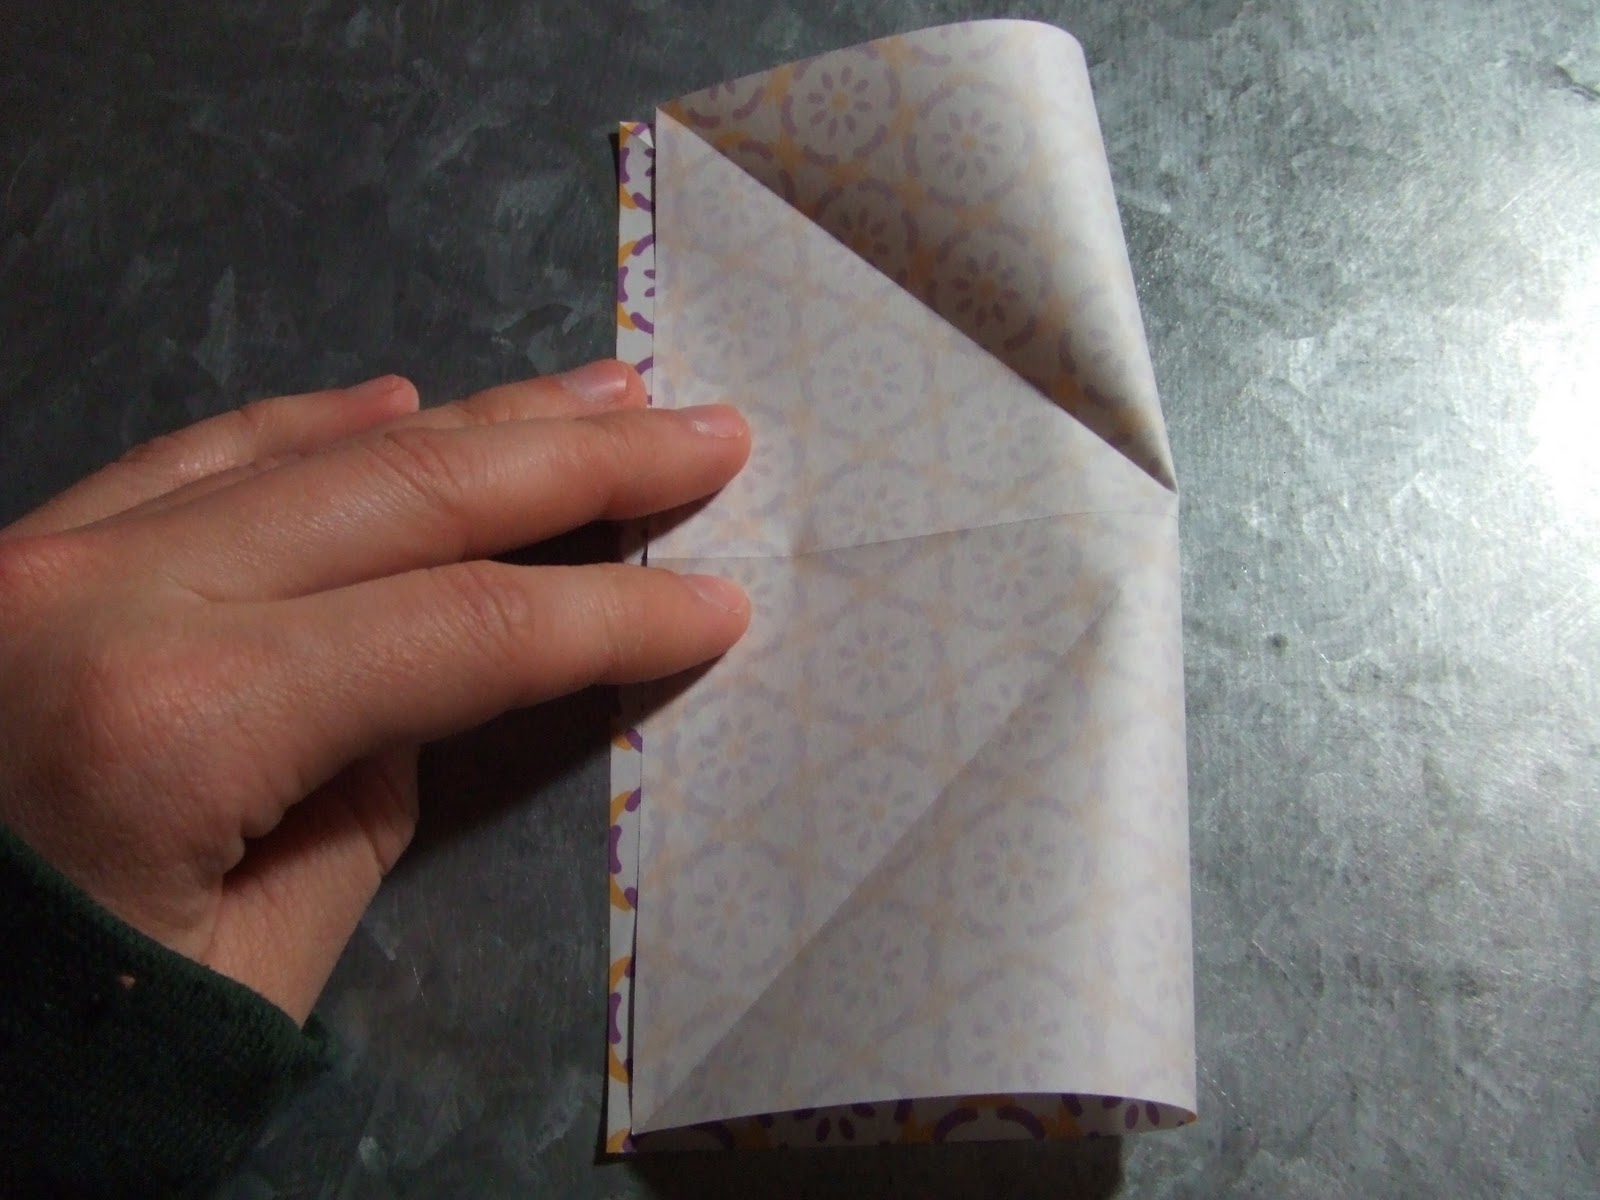
Step three.  Bring the top 3 corners of the square down to the bottom corner.  This will start to tuck in two of the flaps leaving you with a small square.


 Flatten the paper pressing each crease well.

 
Step four.  Now take one of the flaps and fold it toward center crease line and then unfold.

 
 Step five.  Open and flatten this flap by sticking your finger in it to create a pocket like this.


Now, smoosh the flap down until it's flattened.  Remember, this is only paper.  If you didn't get it just so, then unfold and try again.  See how this creates something that looks like a ladies skirt.. with two colorful legs below? 

Oh, and remember to smile... this is fun!

Step six.  Repeat step 4 and 5 on the other 3 flaps until all you have left is the ladies skirt.


Step seven.  Now, ‘turn the page’ of the front and back flaps; so your skirt gets hidden and looks like this.


Step eight.  Take the top layer up from the bottom and fold it toward the top point.  This will make a two triangles of color appear!


Step nine.  Now repeat step 8 on the remaining 3 flaps, so you are left with a pointy tree covered up by a colorful triangle.


Step ten.  Turn your tree upside down and make sure it's laying flat.  There should be an equal number of arms on each side.


Step eleven.  In this step we are pinching or folding two creases through all the layers.  The fold should extend from the diagonal line formed by the colorful (now upside down) triangle.


You can see as I fold the top right arms down it will look a little like this.


And then, open it back up and you can see how the new crease 'extends the line' from the upside down triangle.  I know.. this part takes a little practice, but seriously... don't give up now... you are 90% there!!


Now we are going to bring the top left arms down to extend the line off the other side of the upside down triangle.  Here I am starting the fold....
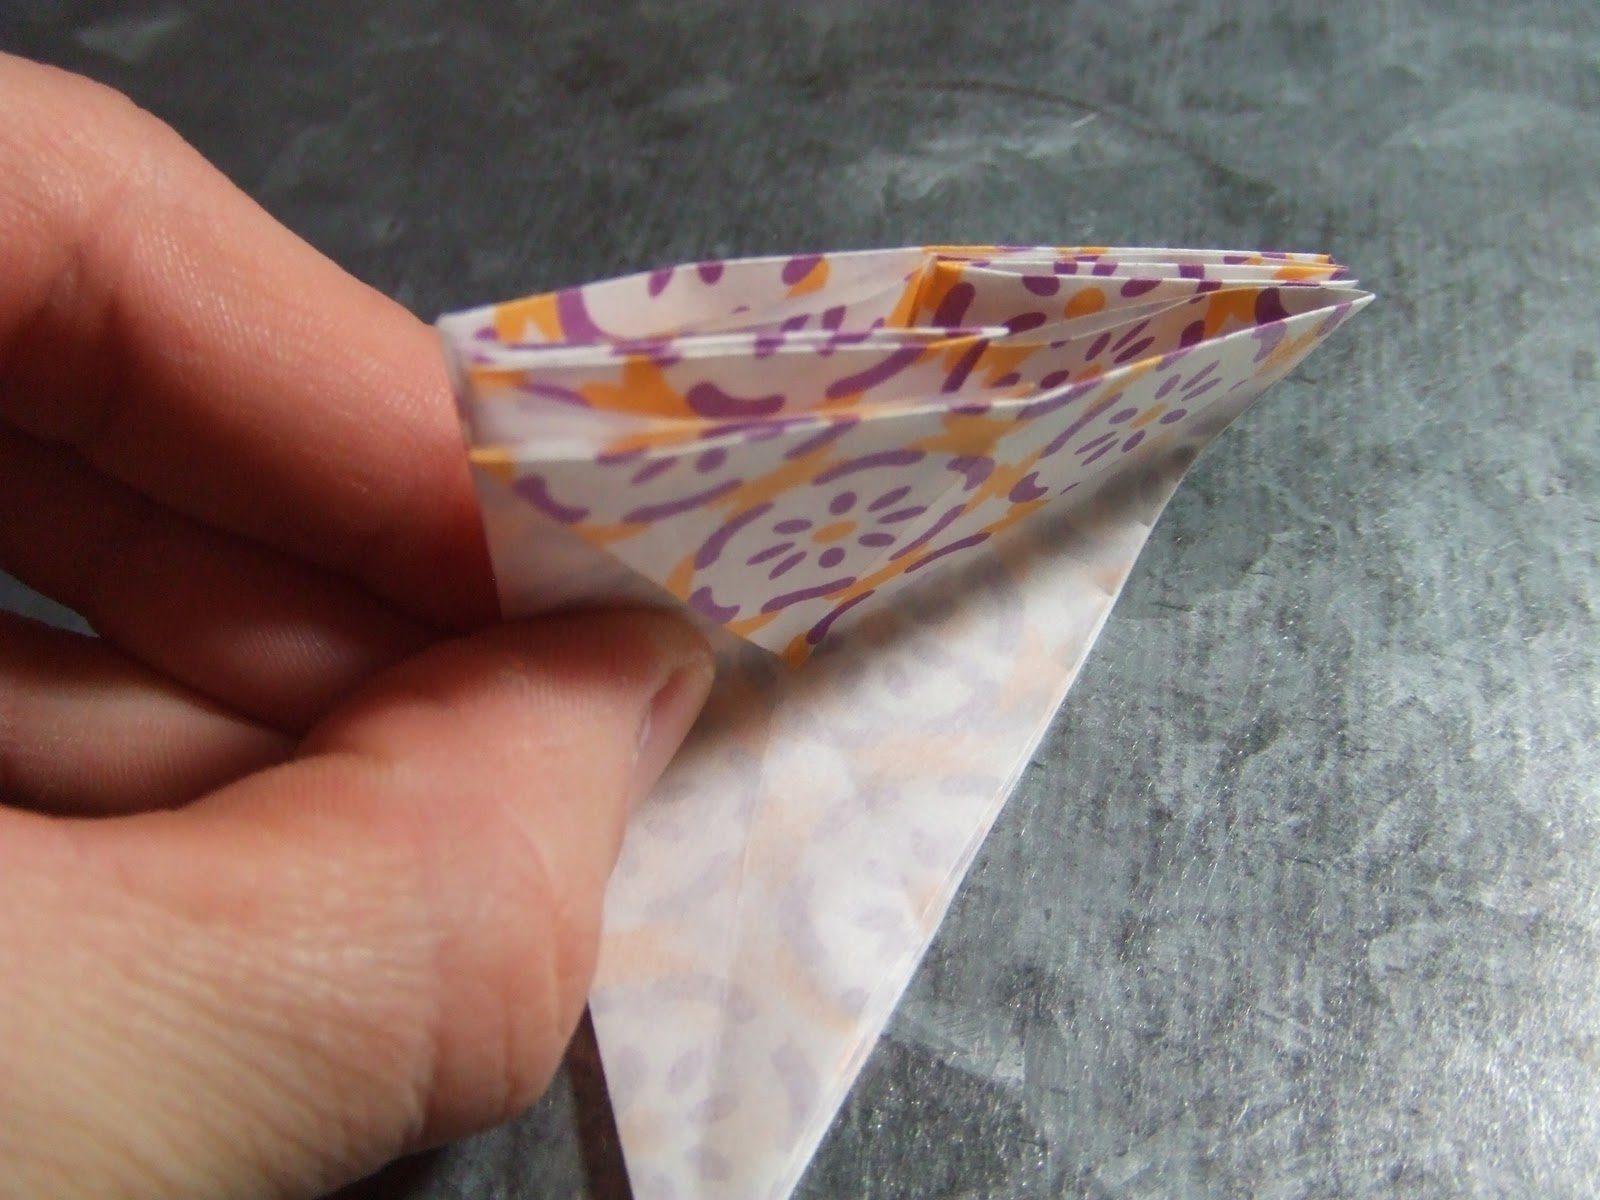

It's folded over....


...and I open it back up.  You will know you have it right.. if you can now see a diamond shape at the bottom point created with the creases you just made.  Whoop whoop!!


Step twelve.  Now grab the diamond between your fingers and you see how I am making the fold go up?  Keep pinching it there at the narrow end until fold meets in the back. 

Squishy, squishy!!  Remember... it's just paper.  You can't hurt it


Step thirteen.  Holding the narrow point of the model very loosely, pull the outermost petals toward each other until they meet.  It's starting to look like a flower, right? 

Here is what it looks like from the bottom in case you want to compare!


Ok, back to the top.


Step fourteen.  and last step!  We are going to form the petals.  Take each petal, one by one, and pinch the ends, and slightly folding back the tips.


I'm going in for a pinch.... come here you cute 'lil flower you!


*pinch*


The result is a more curvy and fluffed out flower petal!  You guessed it... do that all the way around!


A look from the bottom once all the petals were pinched!


And voila!!  You did it!!!  I'm so proud of you! 


Now embrace your newly found origami awesomeness and make a ton of flowers!!  A whole field full even!

1.25.2011

Be My Valentine - Heart & Joke Origami Tutorial

Valentine's Day is the perfect excuse to whip up a little origami project to say I love you!

We will be making a cute little heart (with a pocket and flap) that you can write a joke on or tuck a love note or candy into!! 


They would also make excellent party name cards, surprises in someones purse, briefcase, or lunch box... or how about putting one in your Love's coat pocket, car, or winter hat? 

Let's give it a try! 

Step one.  Start with a square piece of paper -- pretty side up.  I used a 6 x 6 inch in the demo and the heart shrank to about 3 inches tall; which was a perfect hand size for me. 


Step two and three.  Take the bottom left hand corner and bring it up to the upper right hand corner to make a diagonal fold (left pic).  Next take the bottom right hand corner and bring it to the upper left hand corner (right pic).

Step four. Unfold the square you will notice you have two diagonal lines making a big X on your paper!


Step five and six.  Fold the bottom edge up to the top (left pic).  Then fold the left edge over to the right edge (right pic).

Step seven.  Unfold the square and you will be left with the original paper with lines across, and up and down.


Step six.  Flip your piece of paper back over so that the pretty side faces down.  In this step, you are looking for the square that was made from the folding outlines.  See how the folds sectioned the paper into fourths below.


Step seven.  Here you want to pull the paper in behind that square we found in the last step.  See how part of the paper gets tucked in behind the square. 

You'll know you have it right when you now are holding a square 1/4 the size of the original piece of paper with the pretty side tucked inside the square.  (Yes, I switched my demo origami paper in between steps, ha!)


Step eight.  Turn your square so that the open flap part is now at the top of the square.  Lika so...


Step nine and ten.  Take one of the arms from the top and fold it down to the bottom point (left pic) -- which should now also show off that amazing color in the middle! Now, flip the square over and repeat the same thing here... pull the arm down to the bottom point (right pic).
Step eleven.  At the new top now you can see there is a split between what could be two antennae; grab the left antennae (left pic) and pull it down past the half way a bit and on an angle to form the top bump of the heart.  Yes, it's ok to be artsy here... many angles will work and you just want to make sure you pull enough down that you can tuck the antennae into the pocket in the middle.

Step twelve.  When you get you top bump looking like you like it... then press to create a fold and tuck that little flap in.

REPEAT Step thirteen to create the right bump. 


Step fourteen.  a.k.a - the easiest step.  Admire the artistic folding job you have done so far and flip the heart over. (pic shows the 'backside' of the heart with the flaps tucked in)

Step fifteen.  a.k.a. - the other easiest step!  Check out the pocket (left pic) and heart flap (right pic).


Step sixteen.  Proceed to play!!!  Here are some of the things you can do with your new Valentine or any lovey-time heart...

1. Put goodies in the pocket!!

I have to admit not a lot fits in the pocket, but part of the fun is trying different things! 

In this one, I wrote a name on the front and then tucked a joke in the pocket. 

NOTE: When writing on the front, using permanent maker, expect bleed through!  I put a folded piece of scrap paper in the flap while I wrote on the front to prevent this.


For the joke I found this free printable Disney joke sheet which was easy to print and cut apart!

Funny, funny stuff!!


I also wrote a cute little something under the flap...  reminder... Katie is my sweet almost four year old golden retriever "puppy!!"


2. Write a joke right on the front of the heart with the answer hidden in the flap!!

Q: "What do squirrels give for Valentine's Day?"


Q: "What did the caveman give his wife for Valentine's Day?"


Here are some other jokes I found in a quick search... 

go ahead...

laughing at corny jokes is good wholesome happiness!

Q: What did the stamp say to the envelope?
A: I'm stuck on you.

Q: What happens when you fall in love with a French chef?
A: You get buttered up.

Q: What is a vampire's sweetheart called?
A: His ghoul-friend.

Q: What do farmers give their wives on Valentine's Day?
A: Hogs and kisses!

3. And why stop there when you can use sappy Knock Knock jokes!!

You're going to love this one!! 


Get it?  Hahahahaha!! 

Yes, I have had a ton of fun making these up!

--------------------And, Mr. Happy this one's for you love!----------------------

Q: "What did one light bulb say to the other?"


Hope you enjoyed making your own origami hearts as much as I did!!  

Perhaps you would to try another origami?
Origami Pine Trees
Related Posts with Thumbnails