Re-posting this since it doesn't seem to be coming back after Blogger's recent hiccup.
I'm here today to help you get your spring flower on. These origami flowers can be used to make a bouquet, decorate a package, as a pin on your lapel, on a headband, decorate a bike for a parade... well you get the point.
They are so cool! After I show you have to make one you are going to want to make a whole field of them! Serious!
Here's how you get started.
Step one. Start with a square piece of paper
(I used pre-cut origami paper). Printer paper has about the right thickness, but you could also use wrapping, news, or magazine paper. With the pretty side of the paper down
(the part that will become the center of the flower) fold the paper diagonally pulling one corner up to the opposite corner.
Open the previous fold you just did.
See, you can do this!! Origami totally rocks!
Yup, you guessed it... now turn the paper 90 degrees and fold the other corner to the opposite corner
.
And yes, open it back up. You should now see an X made from the two folds you just did
.
Step two. Turn the paper over to the pretty side.
Fold the paper in half bringing one flat edge to the opposite flat edge.
Then open up your paper and fold again in the other direction.
Your paper will now have lines horizontally, vertically, and on both diagonals
!
Ta-da!
If you have followed this far, then you are going to be able to do this for sure!
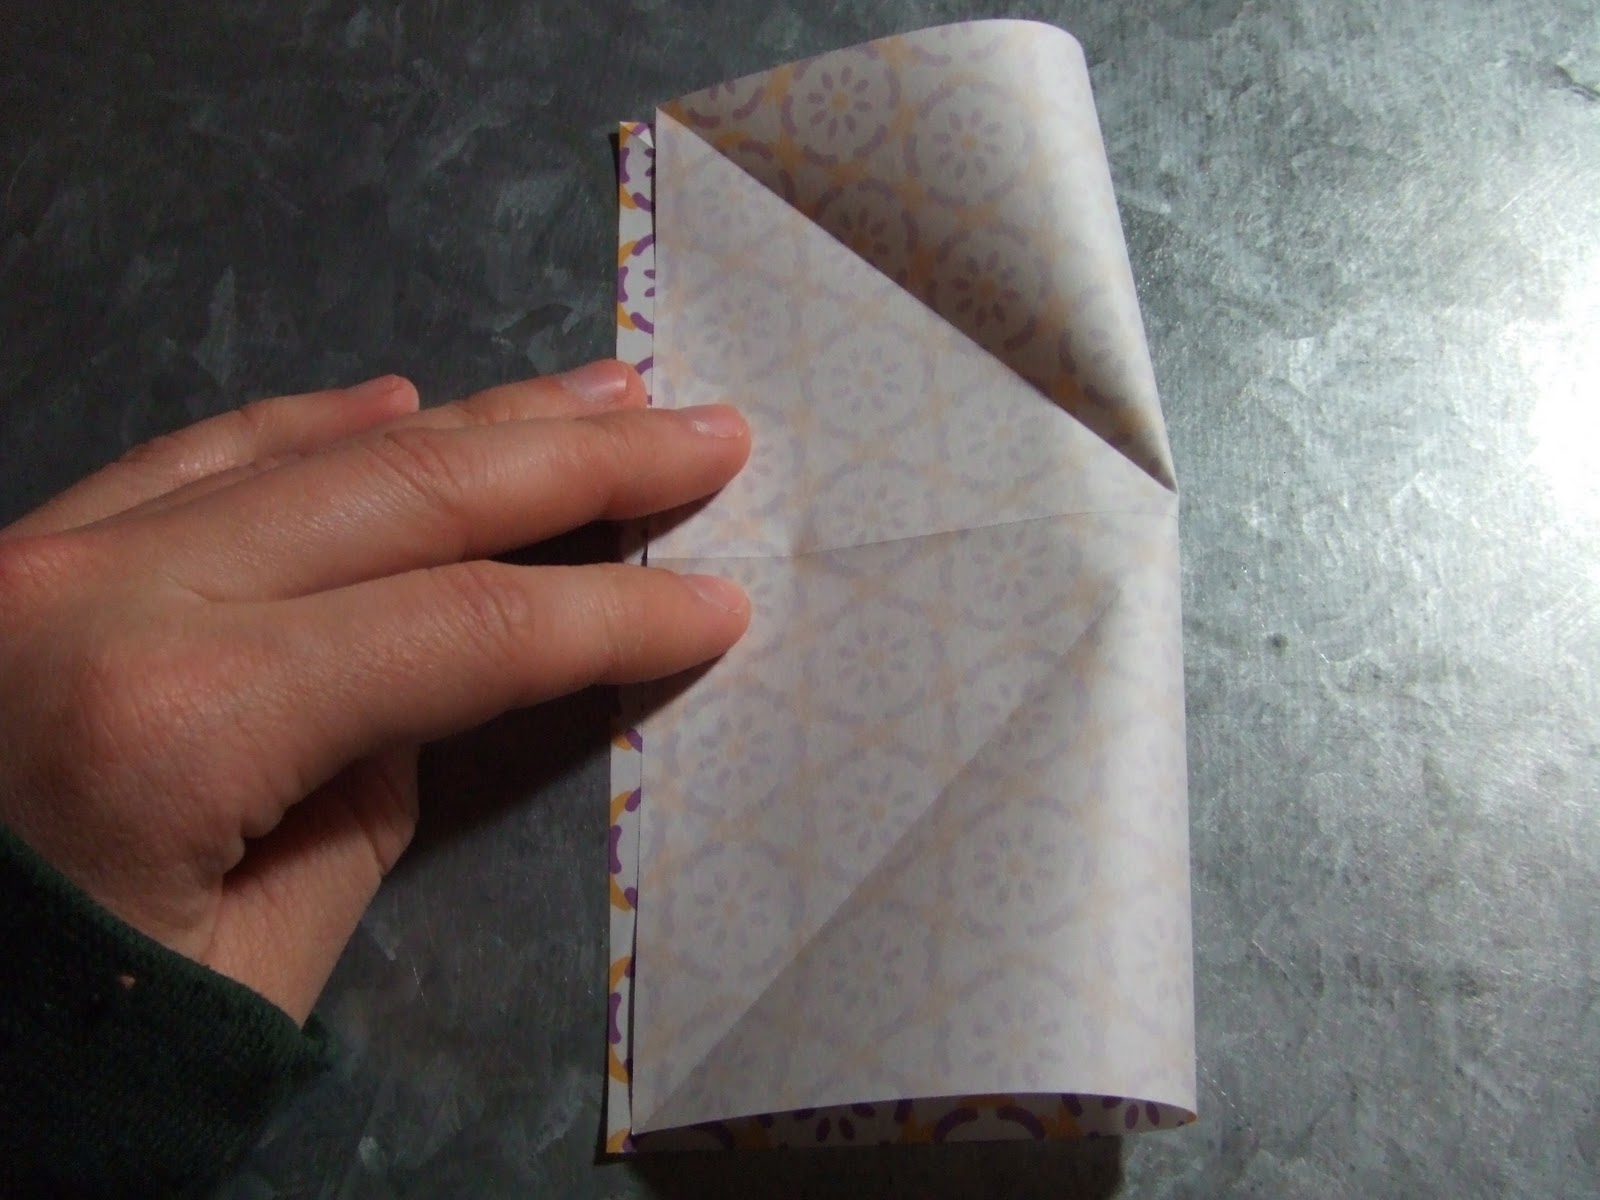
Step three. Bring the top 3 corners of the square down to the bottom corner. This will start to tuck in two of the flaps leaving you with a small square.
Flatten the paper pressing each crease well.
Step four. Now take one of the flaps and fold it toward center crease line and then unfold.
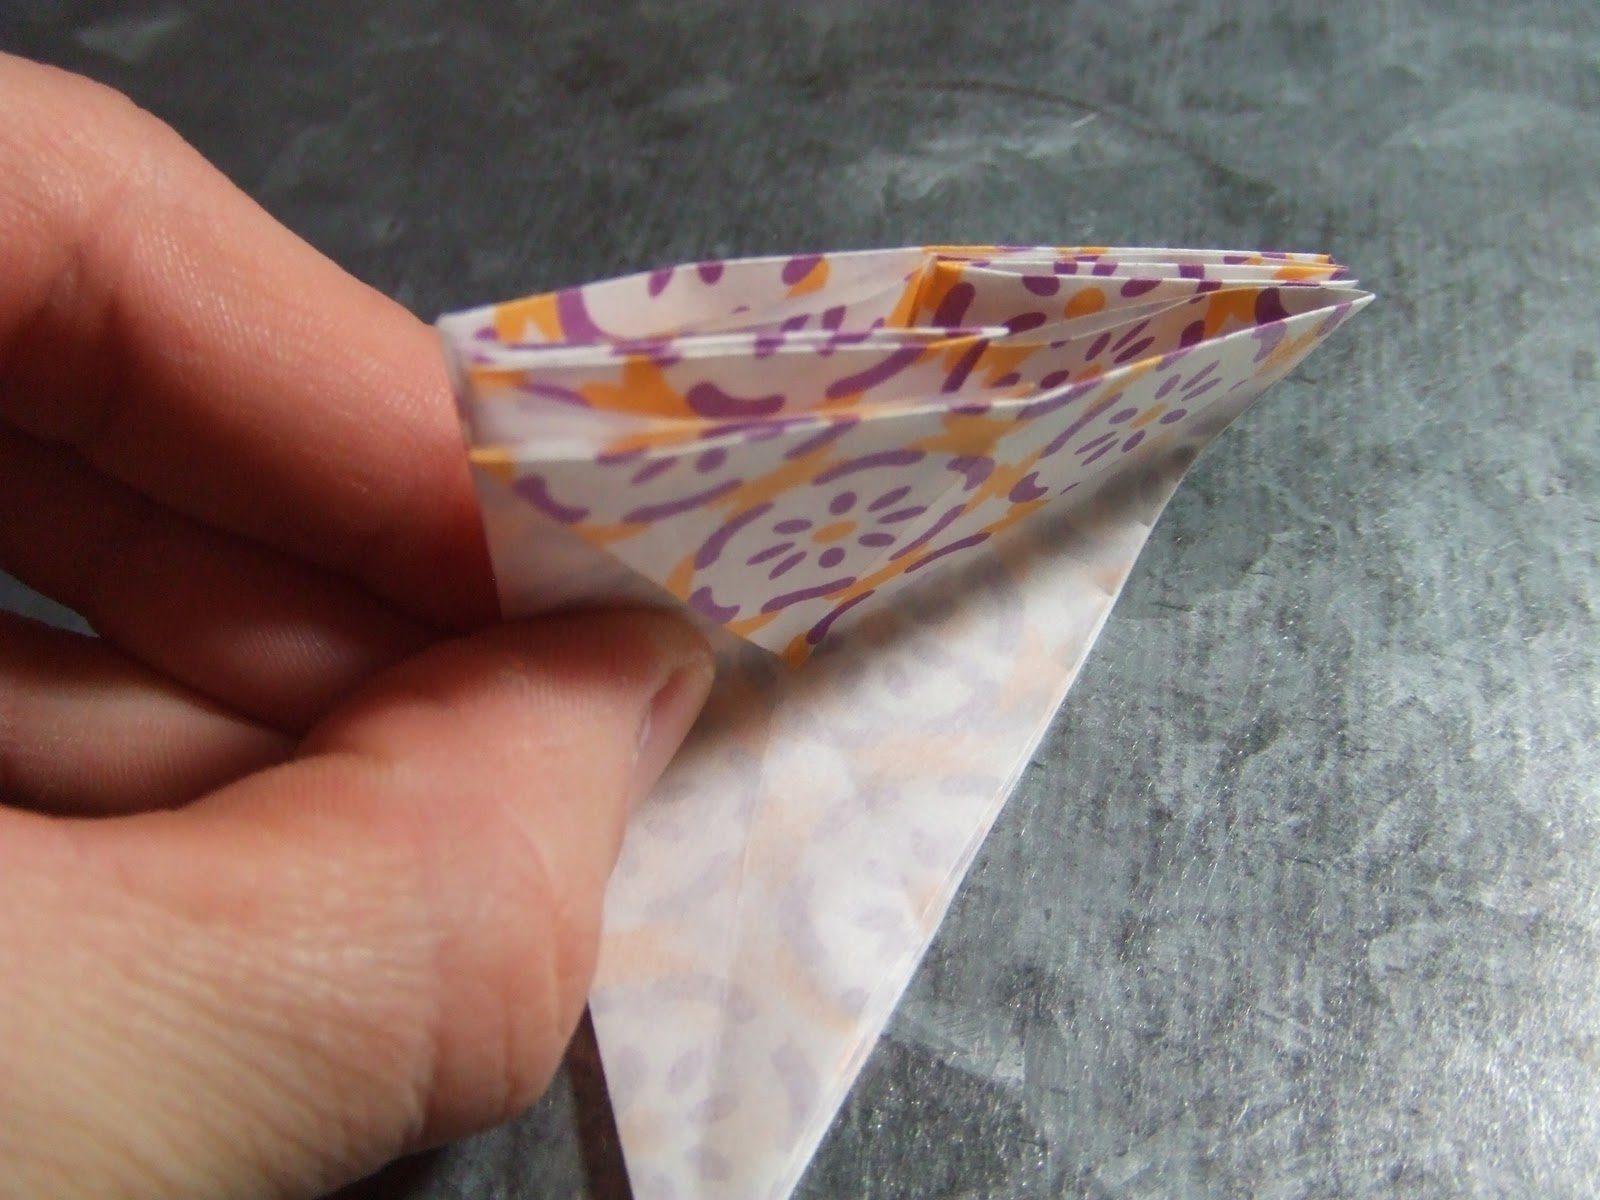
Step five. Open and flatten this flap by sticking your finger in it to create a pocket like this.
Now, smoosh the flap down until it's flattened. Remember, this is only paper. If you didn't get it just so, then unfold and try again. See how this creates something that looks like a ladies skirt.. with two colorful legs below?
Oh, and remember to smile... this is fun!
Step six. Repeat step 4 and 5 on the other 3 flaps until all you have left is the ladies skirt.
Step seven. Now, ‘turn the page’ of the front and back flaps; so your skirt gets hidden and looks like this.
Step eight. Take the top layer up from the bottom and fold it toward the top point. This will make a two triangles of color appear!
Step nine. Now repeat step 8 on the remaining 3 flaps, so you are left with a pointy tree covered up by a colorful triangle.
Step ten. Turn your tree upside down and make sure it's laying flat. There should be an equal number of arms on each side.
Step eleven. In this step we are pinching or folding two creases through all the layers. The fold should extend from the diagonal line formed by the colorful
(now upside down) triangle.
You can see as I fold the top right arms down it will look a little like this.
And then, open it back up and you can see how the new crease 'extends the line' from the upside down triangle.
I know.. this part takes a little practice, but seriously... don't give up now... you are 90% there!!
Now we are going to bring the top left arms down to extend the line off the other side of the upside down triangle. Here I am starting the fold....
It's folded over....
...and I open it back up. You will know you have it right.. if you can now see a diamond shape at the bottom point created with the creases you just made. Whoop whoop!!
Step twelve. Now grab the diamond between your fingers and you see how I am making the fold go up? Keep pinching it there at the narrow end until fold meets in the back.
Squishy, squishy!! Remember... it's just paper. You can't hurt it
Step thirteen. Holding the narrow point of the model very loosely, pull the outermost petals toward each other until they meet. It's starting to look like a flower, right?
Here is what it looks like from the bottom in case you want to compare!
Ok, back to the top.
Step fourteen. and last step! We are going to form the petals. Take each petal, one by one, and pinch the ends, and slightly folding back the tips.
I'm going in for a pinch....
come here you cute 'lil flower you!
*pinch*
The result is a more curvy and fluffed out flower petal! You guessed it... do that all the way around!
A look from the bottom once all the petals were pinched!
And voila!! You did it!!! I'm so proud of you!
Now embrace your newly found origami awesomeness and make a ton of flowers!! A whole field full even!