2.27.2011

Weekend a'la Relaxing!

I. am. taking. a. collective exhale. 

Letting all the gray and slop of the week slip away. 

Here is a peak into what that looked like this weekend. 


I can feel my shoulders relaxing.  My eyes feel more rested.  And I am smiling and laughing with the mister.  

Honestly, this weekend has been the best medicine a tired stressed gal could ask for.  Bring it on March; this tough cookie can't be held back.

2.25.2011

Happy Moment #19: Quilt Designer

A Friday ritual with Soulemama.  A single photo - no words - capturing a moment from the week.  A simple, special, extraordinary, happy moment.  A moment I want to pause, savor and remember. 

If you're inspired to do the same, leave a link to your 'moment' in the comments too!


“Be happy for this moment. This moment is your life.”
~Omar Khayyam

2.24.2011

Katie Dog Days: Snow Princess!

I have a busy day ahead.  Let's take a few moments together to take in the serenity and peace at the lake...

...then laugh at the antics of a pup reminding me of all the marvelous things life and snow have to offer.  How could you not want to run right outside with the promise of this pup to make you smile!!  Katie rocks!!


Hope you are having a lovely day!

2.23.2011

Sew, What's Going On?

--ONGOING--
Happy Quilt-a-long - Tribal
I am managing to stay caught up with the 
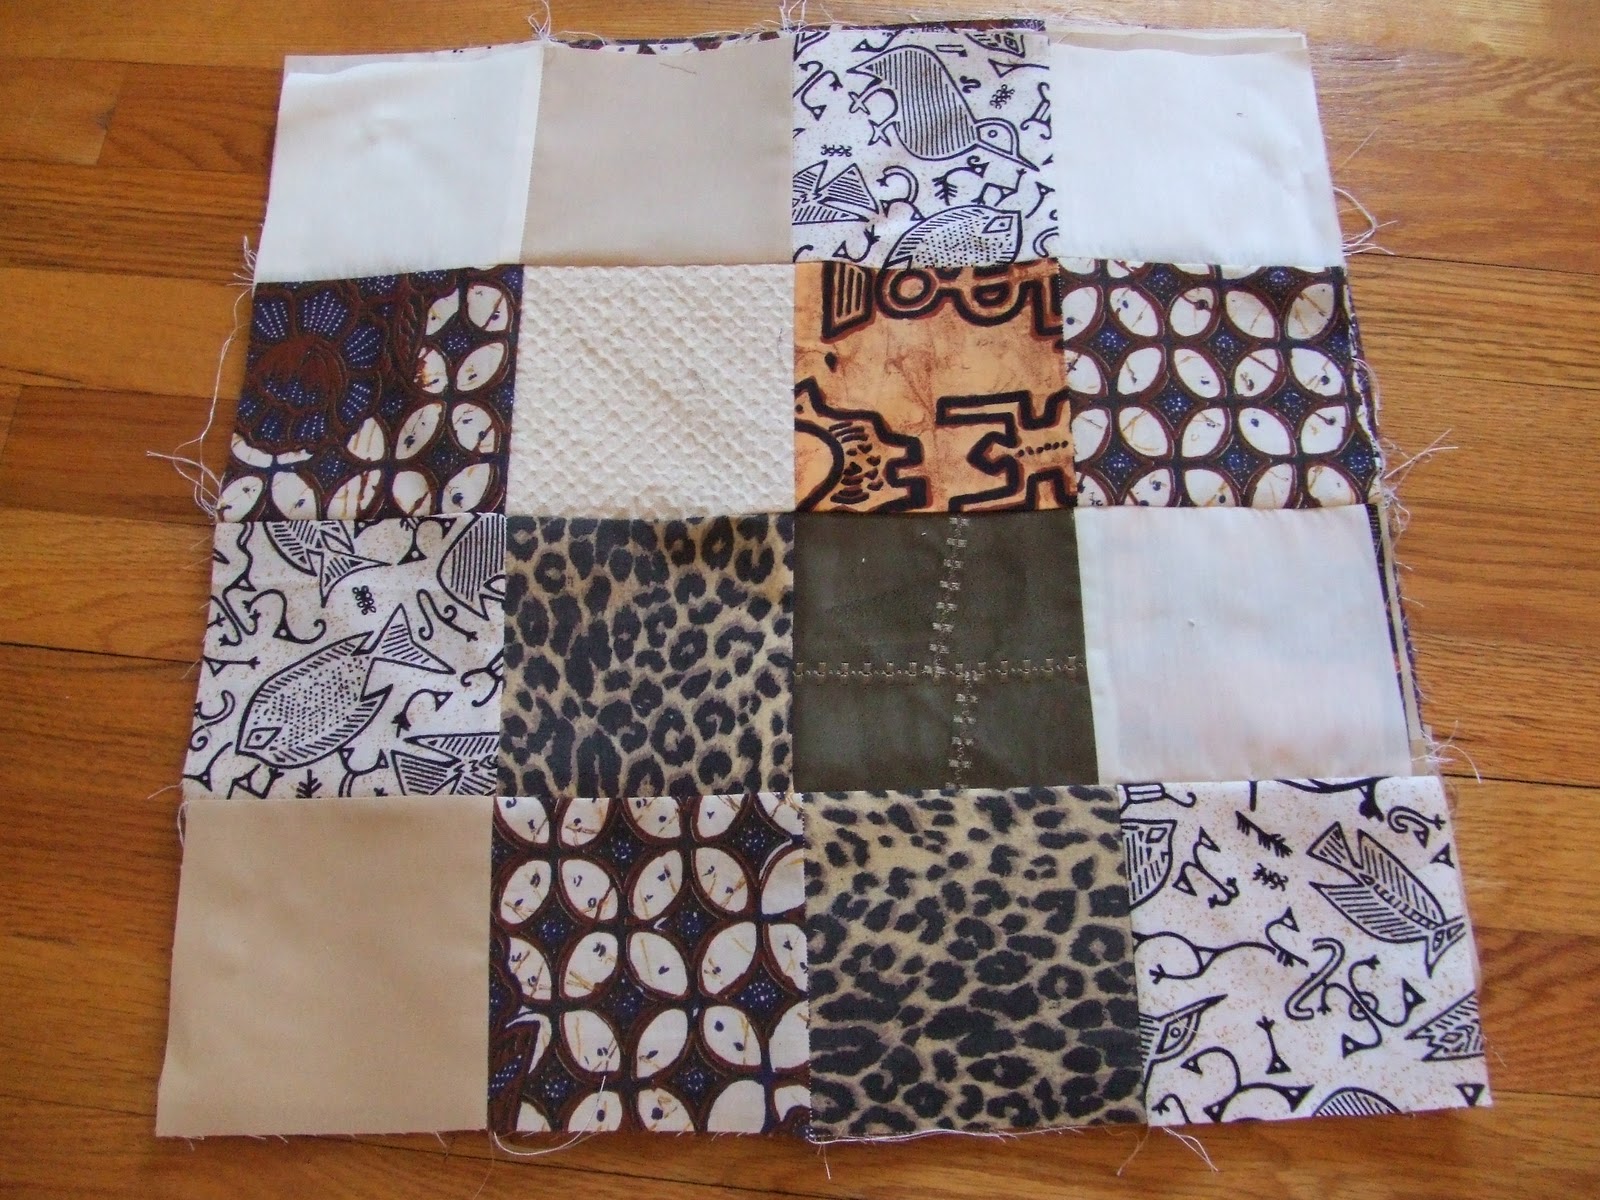
quilt-a-long I joined so far!  This past week we put together 16 patch blocks in a random fashion.  It was fun to put all the different fabrics next to each other!!

A mid point in assembling.

They are assembled, and need ironing!

And here you go!  Six 16 patch blocks all hanging out together.

For the most part I am happy with how my seams matched up.  And the randomness is fun.


I just found out that our next step is to cut these blocks down the diagonals and reassemble to make a different shape.  It's pretty innovative and I am looking forward to cutting again tonight (after I fix a few rogue seams that got away from me -- see the bottom right of this block below)

The sashing comes next -- which means I should pick it out already.  I am thinking a chocolate brown or maybe I'll pull another tribal print.  I think it will be easier to decide once I have the diagonal cuts and re-sewing done.

What do you think?

Best part... this quilt really is coming together quickly... you can use charms (pre-cut 5x5 inch squares) which saves cutting time... and the randomness.. have I mentioned how much fun it is?  I can see making this quilt pattern again!

Central Park Pin Wheels

Most of my weekend was focused here in Central Park land!  A happy, wonderful, colorful place!

I finally assembled the center and had that giddy moment about how fun it is to use such big squares to show off these prints!


Then I spent a lot of time making sure all those square and pinwheel seams matched up.  For the most part it looks pretty dang right on!  whoop whoop!

This is the backing I am looking to use.  I laid it out and the fabric isn't quite wide enough to accommodate which means I need to 'design' the back now. 

Originally I was thinking of using some of the left over pinwheels.  But looking at this pictures... wow that is a 'loud' fabric.  I might head more in the direction of a big thick brown stripe offset from the center. 

Another look at the pinwheels and backing together.  Aren't those birds cute!!

And another glory shot of the front all pieced together and ironed.  I'm really liking it!!

And yes, this quilt top is officially Katie approved!  That's the highest mark of quality I could ever hope to reach.  She lays on it every time I turn around.  So cute!

X Marks the Spot

I haven't pulled this one out this week.  Although, now that Central Park is off the design board... this is the next one to go up and get it's arrangement.


You Can Sew-a-thon!
Read the intro to our sewing adventure here 

No progress here.  I think one project a month is going to be where I head with this.  The good news.. it's almost March -- meaning time for the next project!!


--BACK BURNER-- *cricket, cricket*

Tulip Runner - no change here, but getting closer to picking this one back up.

This Week's Work in Progress (WiP) Stats
Last WiP Wednesday Total: 5
New Projects: 0
Finished Projects: 0
Total WiP's: 5

---Linking to W.I.P. Wednesday---

2.22.2011

Hands in Dirt {paperwhites}

There was a bit of spring that poked it's head in to say hello over the weekend that has me swooning for some 'hands in the dirt' time!  For those of you who are just getting to know me... I am usually at my happiest when my hands are in the dirt gardening.  Are you that way too?

Here is my mid-winter gardening improv since the temps are back to single digits (F) and everything is still mega frozen.

I gathered a bunch of small containers.  Some are meant to be dirt pots, others were mugs (the golden retriever one is cracked, but is way to cute to be thrown out) or jars at one point in their life.  But today and for the next few months they will all be dirt pots!


I remembered I had bought these paperwhite bulbs around Christmas time when they were on sale.  They sat hidden and mostly forgotten in the garage since then.  The poor things needed rescuing!


Still, it's funny how determined they are... the bulbs were sprouting right in the bag, so I figured why not... let's plant them and give them a real chance!

And here are all those cute little green tips ready to be watered and set in a well lite place to grow!  I put one bulb in each container and then distributed the containers throughout the house to add cheer all around!

The extra cool factor, is that once these have bloomed, I can transplant them to the outside garden (once the frost warnings are gone) and they will bloom year after year!!  How's that for resourcefulness!

And, speaking of flowers... just look at these beauties!!  So bright and delicate!  The mister truly spoils me!


See that first jar -- the one closest in the picture?  Yes, that was the inspiration that started this whole thing.  I needed another container to have a total of six, so that I could get these babies planted. 

You can read about how I created the fabric covered jar/pot and make one of your own!

There is something about doing this that has me convinced spring is another day closer!!  Until then, we will keep a close watch as these bulbs grow and hopefully bloom (despite my earlier neglect).

Sending warm thoughts your way!  Unless your hot, in which case I have some snow and ice I could spare :)

Confetti in the Snow {finale}

I promised a real unveiling, with classy pictures for Confetti.  This is just for you dolls!!


...apologies if you are groaning at seeing this tiny quilt for the millionth time... newer things are on the way this week ;)

2.21.2011

Fabric Covered Jar/Pot


This fabric covered jar is a cinch and would be a really cute gift for Mother's Day, birthdays, and can even be used as personalized storage!

Ready?  Let's grab a few supplies and a few free minutes and pull one of these together!

I started with this empty queso jar.  You could use any container really, but the cool thing about using this is... it a fun way to 'upcycle' what would otherwise be considered trash/recycle.  Bonus... it's low cost!!!


I also grabbed a handful of fabric scraps I have saved from other projects and a medium sized paint brush.


Last ingredient is that sticky awesome glue called Mod Podge!!  I used the outdoor variety for this project since I wanted to make sure the final jar was water proof.  Just imagine all the uses!! (hint: flower pot!)


Start by removing any stickers (or not) and then slather mod podge glue all over the surface of the jar.


Now, start layering the scraps on in any design.  I was going for crazy random, so just started picking up pieces and placing them on.


It's ok if the pieces overlap.  And feel free to dab extra glue where you need it to help the pieces stick.


Once the fabric scraps cover the surface of the jar...


Yes! Slather on the mod podge!!  Lots and lots.  It dries clear, so it's ok to lay it on a little thick in order to make sure all the edges are glued and covered.


Last step.  Find a place for the jar to dry.  I tipped my upside down on a screwdriver tucked into my pen holder.  You are basically looking for a spot away from doggy hair and tongues... and Little's fingers. 


After a short while the glue started to set nicely and clear up.  Just look at all those pretty scraps!!


You know it's ready to go when it's no longer tacky to the touch.  And voila!!  Your very own fabric covered jar!


I discarded the lid, but you could give the lid the same fabric treatment if you like.

Then it's just a matter of filling the jar with something {...candle, candy, small cookies, trail mix, a cupcake, a love note, bubble blowing liquid, or even dirt...} and wrap with a ribbon for the thoughtful and reusable gift!


I'm willing to bet that kids + glue = a fun time for all!

Hope you give this a try... and I would certainly like to see what you make, feel free to share a link below so we can all see!!

I will show you what I put in my jar tomorrow right here!

--Linking to---
All About You Monday at Texas Monkey
Making the World Cuter Mondays
Midweek Blues at The Dusty Cellar
Letting the Creative Juices Flow
Take-a-Look Tuesday at Sugar Bee
Talent Tuesday at Vintage Wanna Bee
What's Up Wednesdays at Sew Woodsy
Your Way Wednesday at Elle Belle Creative
Related Posts with Thumbnails